
AntForms First Integration: Google Sheets—Why It Matters and How to Set It Up (2026)
Your form is live. Submissions are rolling in. Then you spend the next hour downloading CSVs, opening spreadsheets, and copy-pasting rows so your team can see the data. Sound familiar? AntForms’ first native integration is Google Sheets because that’s where the pain is sharpest: forms collect data, but without a direct link to a spreadsheet, you’re stuck doing manual work that scales terribly. This guide explains why a form-to-Google-Sheets connection is required, how the AntForms Google Sheets integration helps users, and gives you a step-by-step setup so every submission becomes a new row in your sheet—no code, no Zapier, no export. For more on moving form data automatically, see sync form data to Google Sheets or Airtable with webhooks, send form submissions to your CRM, AntForms free form builder, and what you can build with AntForms.
Here’s what you’ll get: a clear why (eliminate manual entry, real-time collaboration, zero infra), a how (Connect → Integrations → Google Sheets → choose destination → test), and best practices (when to use Sync existing, how to check Sheet deliveries). By the end you’ll know exactly when and how to use AntForms’ Google Sheets integration so your forms and spreadsheets stay in sync in 2026.
Why Form-to-Spreadsheet Integration Is Required in 2026
Form-to-spreadsheet integration is required because it removes manual data entry, cuts errors, and lets teams work in the tools they already use—spreadsheets—without building or maintaining a custom backend.
If you’ve ever exported form responses and pasted them into a Google Sheet, you know the drill: export CSV, open the sheet, paste, fix columns, repeat. For low volume it’s annoying; for real traffic it’s a bottleneck. Businesses need form submissions in a spreadsheet for three core reasons.
First, manual entry doesn’t scale. Every minute spent moving data from a form into a sheet is time not spent on analysis, follow-up, or product. Studies and practice show that automatic syncing reduces errors and frees teams to focus on decisions, not data wrangling. A direct integration means submissions land as new rows as they happen—no download, no copy-paste.
Second, spreadsheets are the default for many teams. Google Sheets is free, collaborative, and already used for reporting, dashboards, and sharing. Putting form data directly into a sheet means the same file can drive charts, filters, and team access without a separate “form backend” to maintain.
Third, real-time matters. When a lead submits a form, you want that row visible immediately so someone can follow up or so your sheet stays the single source of truth. Form-to-Google-Sheets integration delivers that: each submission becomes one row, with columns matching your form fields, so you get workflow efficiency without building APIs or middleware.
That’s why AntForms made Google Sheets its first integration—to give users a one-click path from “form submitted” to “row in my sheet” with no code and no extra services.
How AntForms’ Google Sheets Integration Helps Users
AntForms’ Google Sheets integration helps users by sending each form submission to a chosen spreadsheet as a new row, with optional creation of a new sheet, test row, and sync of existing responses—all inside the Connect tab.
No code, no Zapier. You don’t need Google Apps Script, a serverless function, or a Zapier/Make workflow to get form data into Sheets. In AntForms you go to Connect → Integrations, pick Google Sheets, sign in with Google, and choose a destination (new sheet or existing). After that, every submission adds a row automatically. Descriptions in the UI spell it out: “Send each form submission to a Google Sheet as a new row. Connect your account, choose a spreadsheet, and responses will sync automatically.”
One place for form data and analysis. Once responses land in a sheet, you can use formulas, filters, pivot tables, and charts in Google Sheets. That’s built-in analytics and reporting without leaving the spreadsheet. For more on turning form data into decisions, see form analytics and metrics that matter and beginners guide to analyzing form data and insights.
Visibility and trust. In Connect → Integrations → Google Sheets you get a card for each connection (e.g. “AntForms Responses: Sheet1”) with a Send test row and View deliveries option. Sheet deliveries show recent syncs (e.g. session ID, timestamp, “Success”) so you can confirm that submissions are reaching your sheet. That verifiable data flow is how the integration helps users trust that nothing is lost in translation.
What You Get: Native Google Sheets vs Webhooks
AntForms gives you two ways to get form data into spreadsheets: native Google Sheets (Connect → Integrations) and webhooks (Connect → Webhooks). Each has a clear role.
| Aspect | Native Google Sheets (Integrations) | Webhooks (e.g. to Apps Script / serverless) |
|---|---|---|
| Setup | Connect → Integrations → Google Sheets → sign in → choose sheet | Connect → Webhooks → add URL (e.g. Apps Script Web App or function) |
| Code | None | You provide an endpoint that writes to Sheets (or another store) |
| Best for | “I want rows in a sheet with zero code” | Custom logic, multiple destinations, or non-Sheets backends |
| Testing | Send test row + Sheet deliveries | Send test request + Deliveries |
When to use the native integration: You want every submission as a new row in one (or more) Google Sheets with no scripting. You’re fine with AntForms creating or using a sheet and mapping form fields to columns. This is the fastest path for most teams.
When to use webhooks: You need to POST to your own URL (e.g. Google Apps Script, Cloud Function, Airtable, CRM). You can still write to Google Sheets from that endpoint; see webhooks sync form data to Google Sheets or Airtable for the payload shape and examples.
AntForms’ first integration is Google Sheets because it covers the most common case: “put my form responses in a spreadsheet, automatically.”
Step-by-Step: Connect AntForms to Google Sheets
Connecting AntForms to Google Sheets is done in the Connect tab: open Integrations, set up Google Sheets, sign in with Google, choose a destination (new or existing sheet), then save and optionally send a test row.
Step 1: Open Connect → Integrations. In the form editor, use the top navigation and click Connect (the tab that shows a chain-link style icon). Under Connect you’ll see two sub-tabs: Integrations and Webhooks. Click Integrations.
Step 2: Start the Google Sheets integration. In the Integrations list you’ll see Google Sheets with a short description and a Set up → (or Connect Google Sheets) link. Click it. You may see a screen that says “Connect Google Sheets” with a short explanation and a Connect Google Sheets button.

Step 3: Sign in with Google. Click Connect Google Sheets. You’ll be prompted to sign in with your Google account and to authorize AntForms to create or access spreadsheets. Complete the OAuth flow.
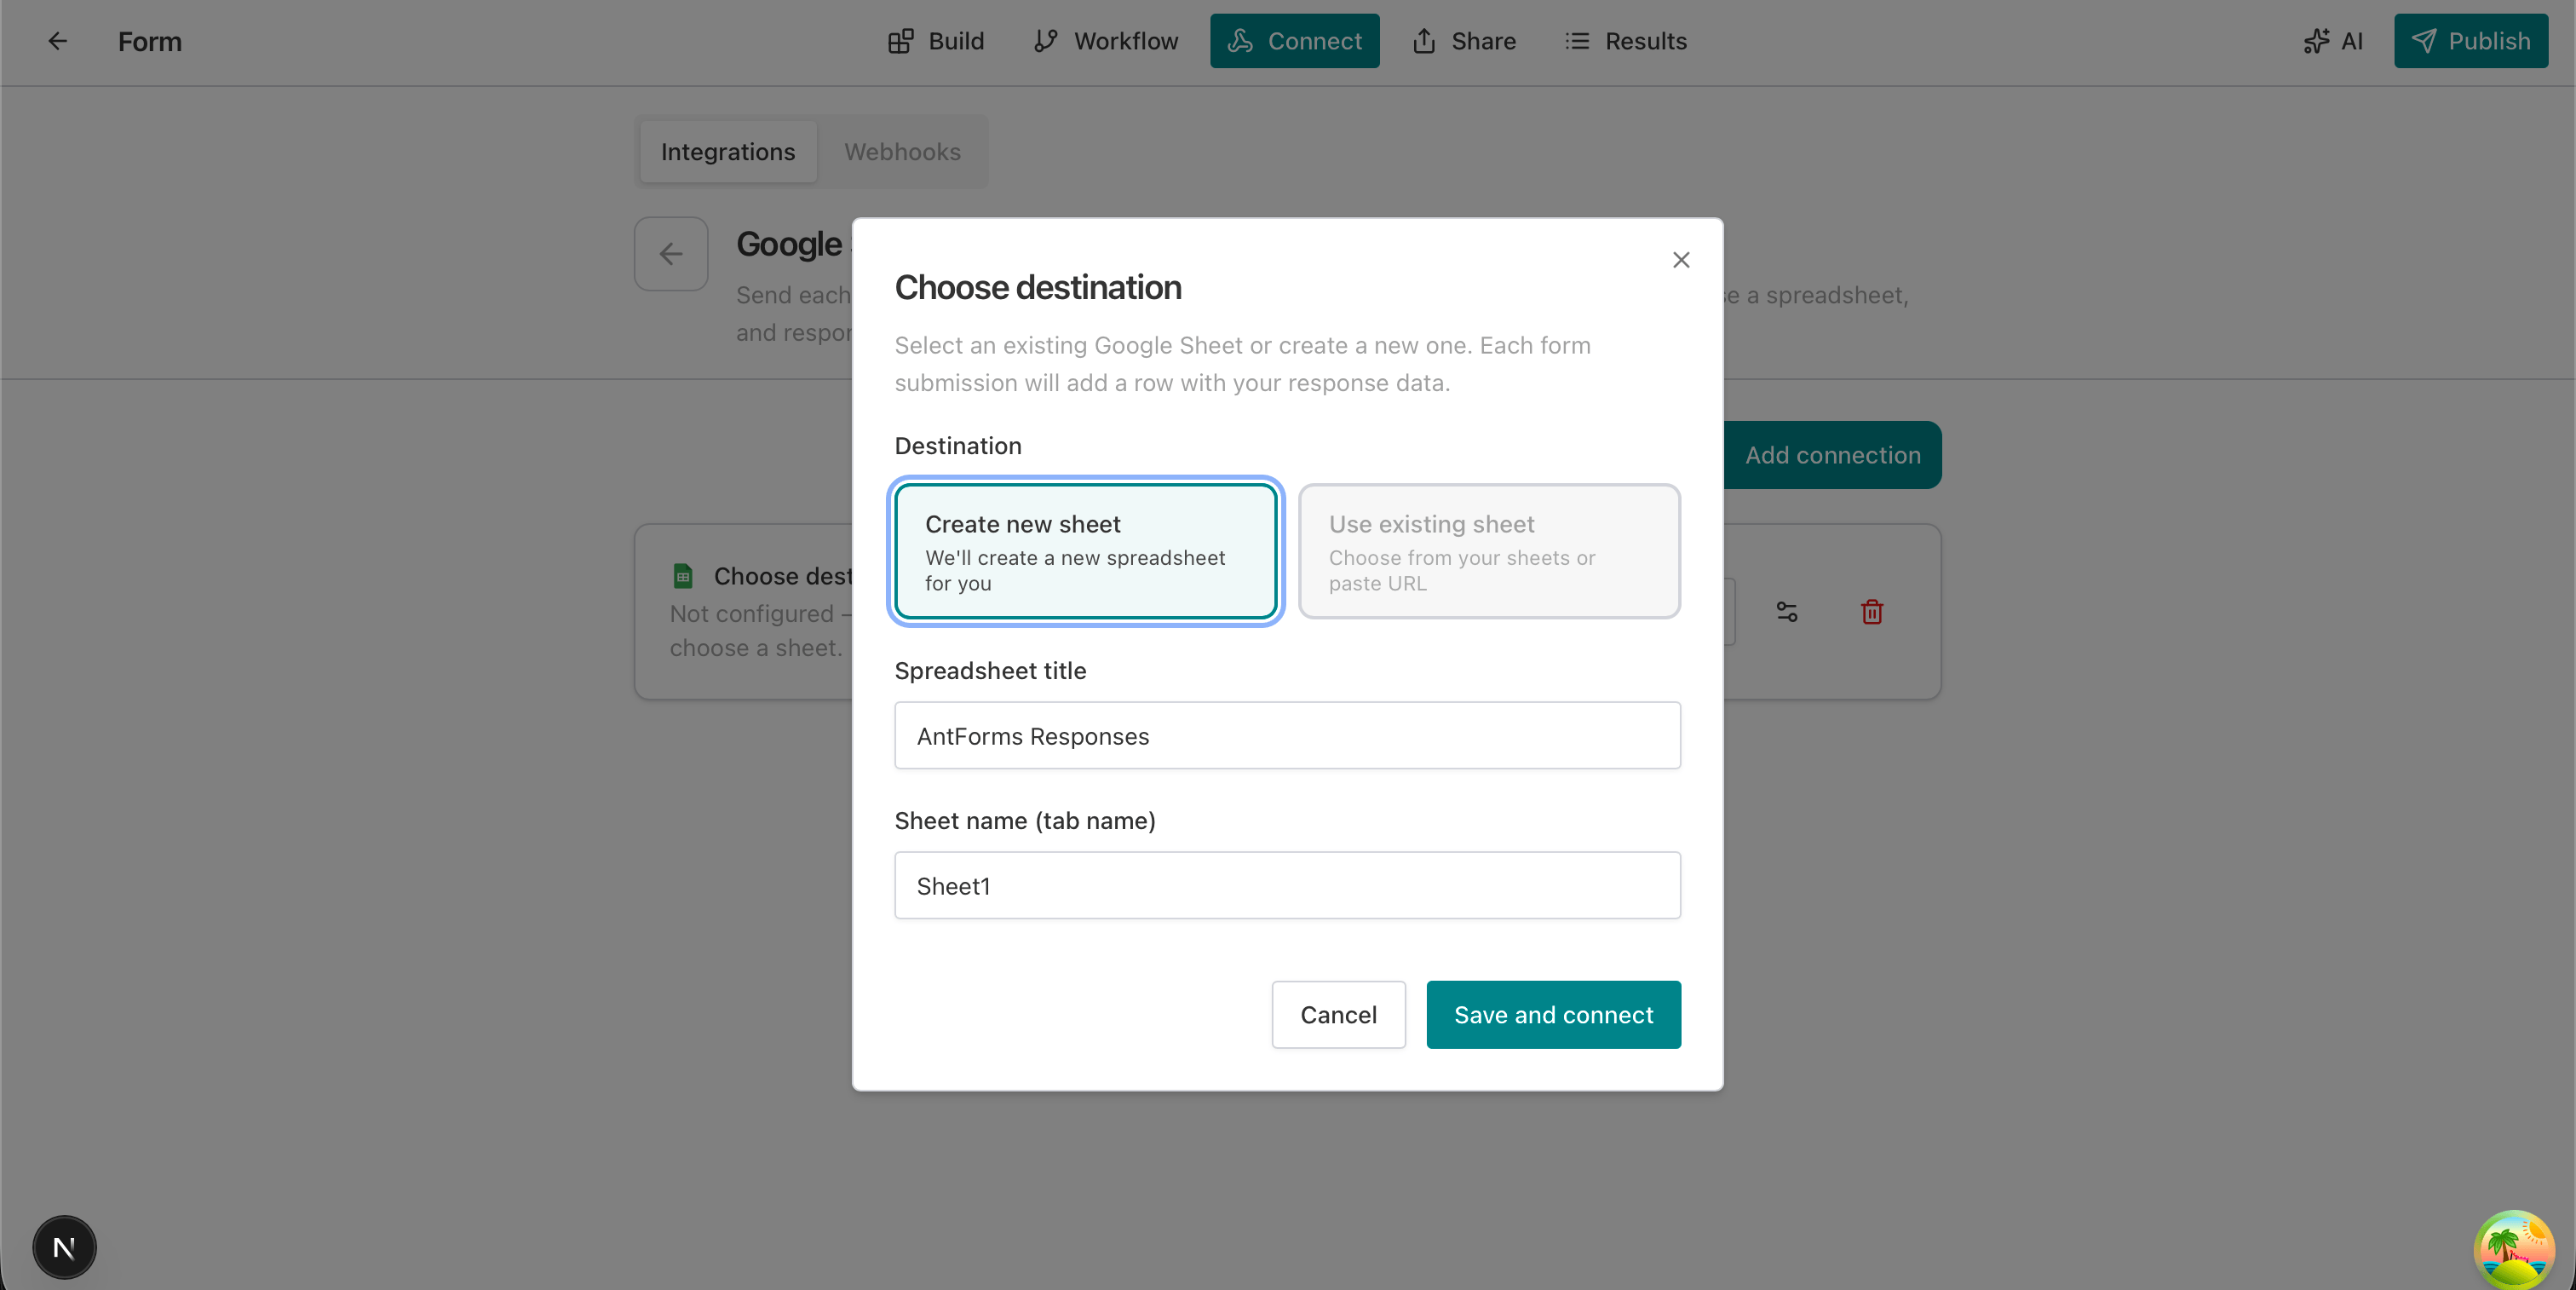
Step 4: Choose destination. A Choose destination modal appears. You can:
- Create new sheet — AntForms creates a new spreadsheet. You set Spreadsheet title (e.g. “AntForms Responses”) and Sheet name (tab name) (e.g. “Sheet1”).
- Use existing sheet — You choose from your existing sheets or paste a sheet URL.
Select one, fill in the title/tab or pick the sheet, then click Save and connect.
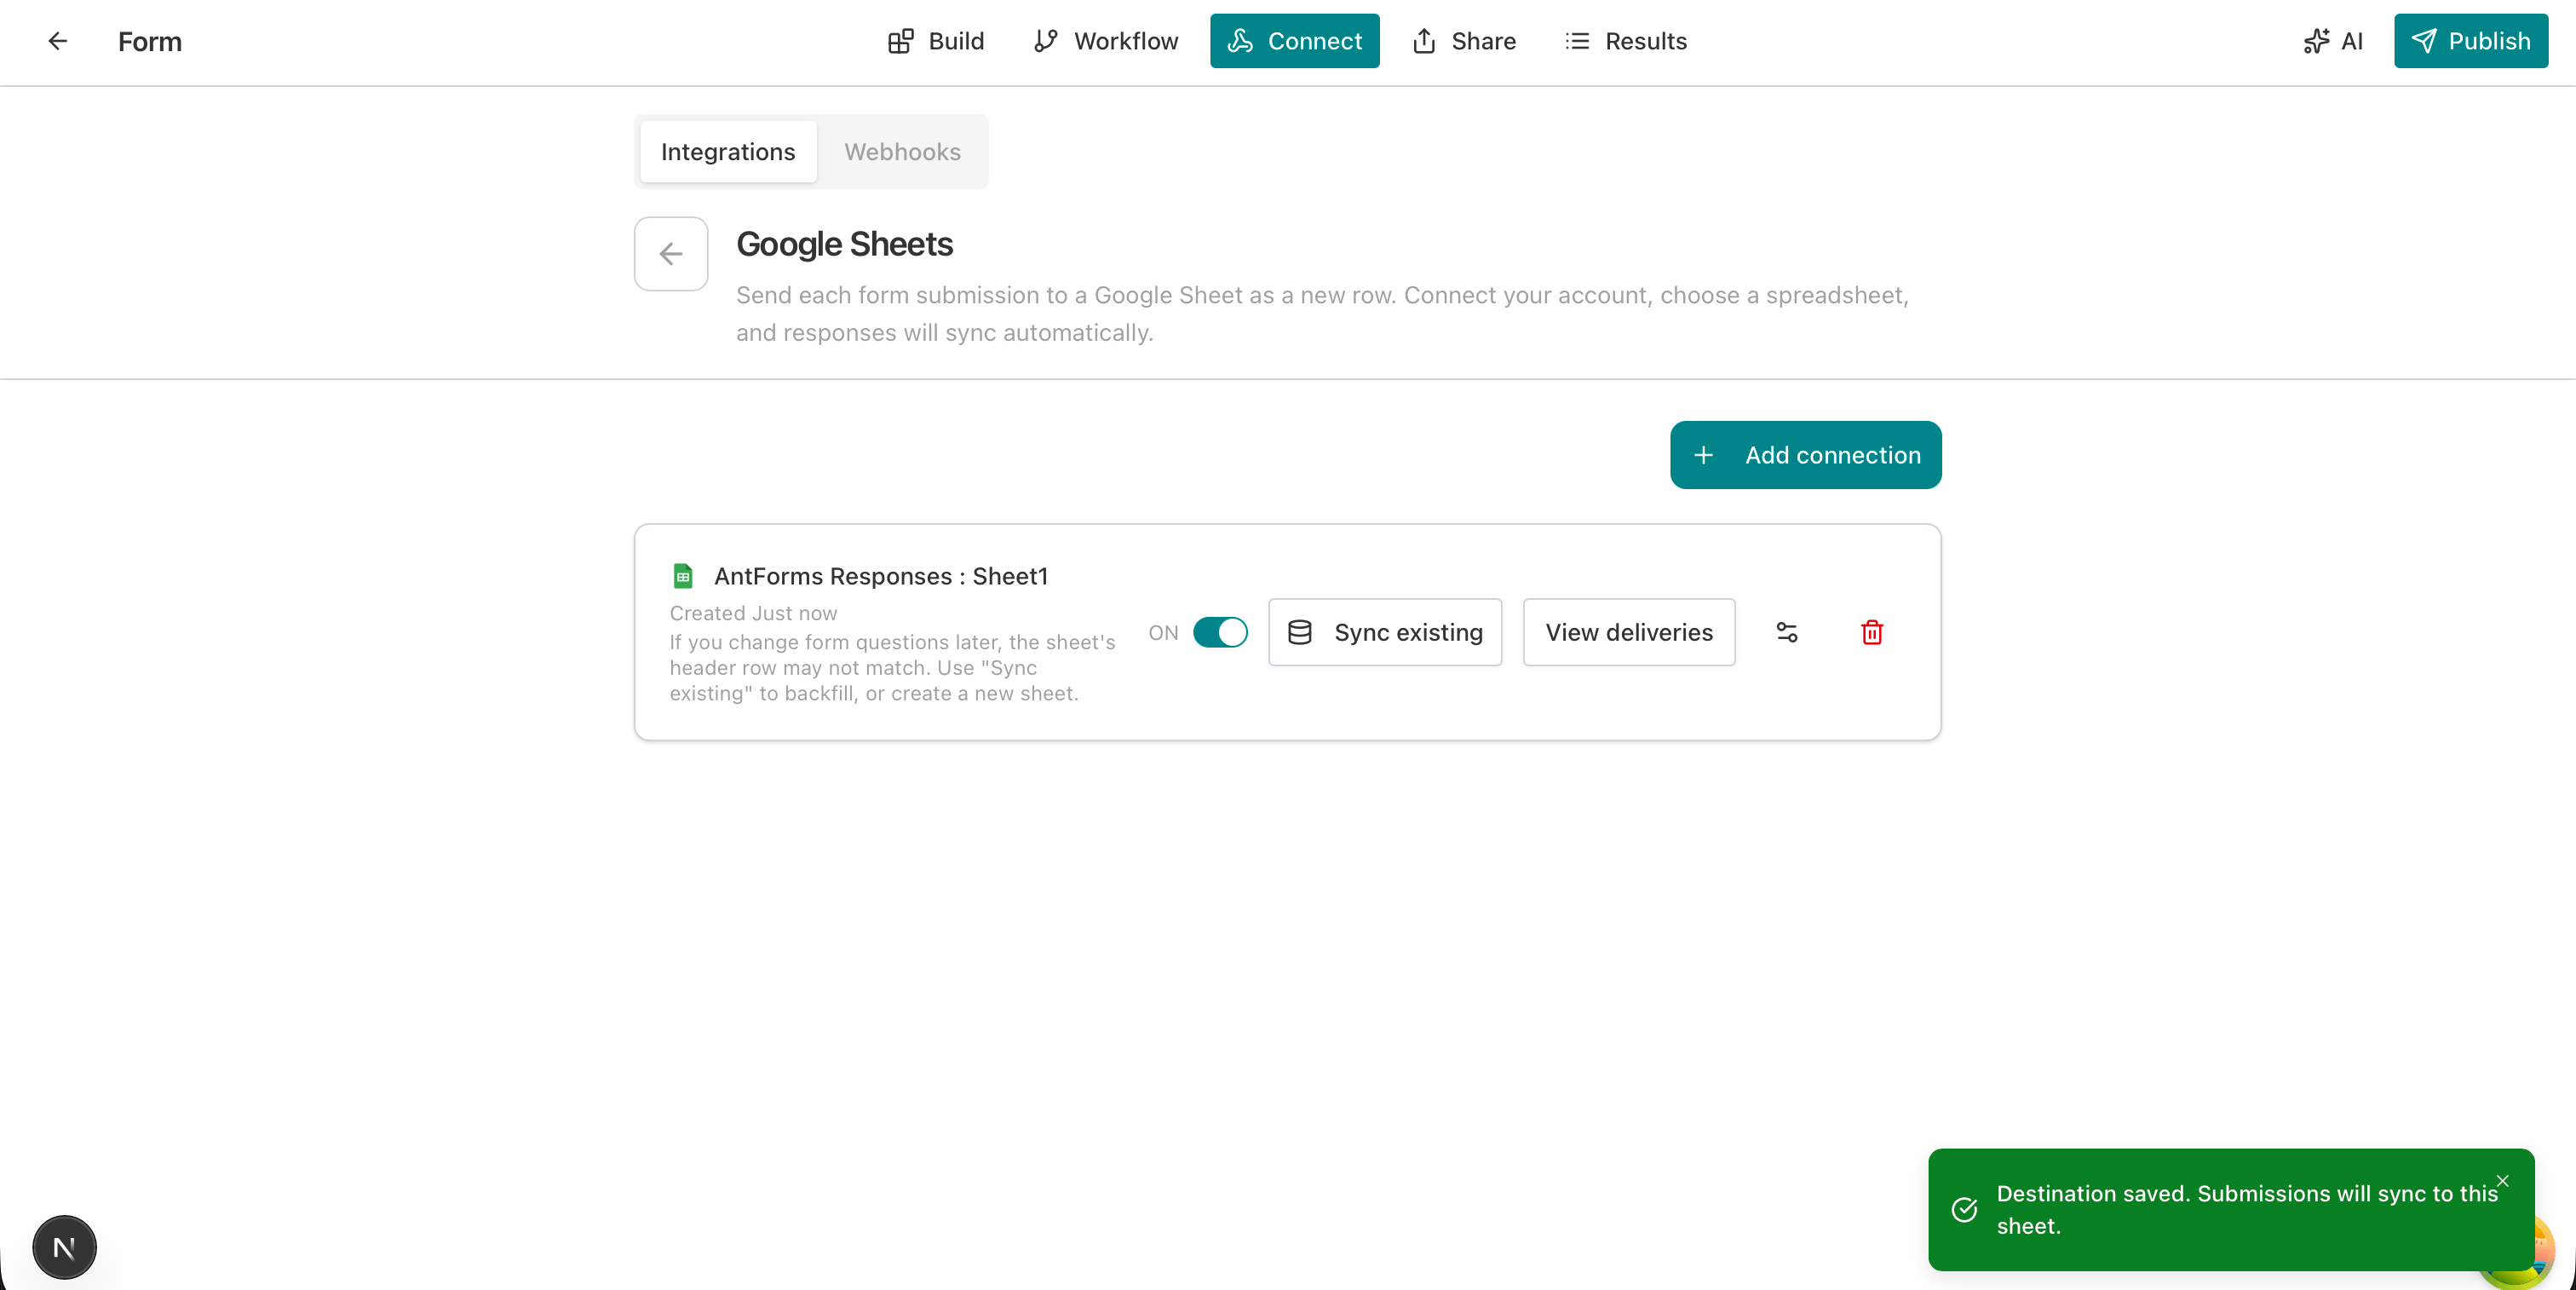
Step 5: Confirm connection. After saving, a green toast confirms: “Destination saved. Submissions will sync to this sheet.” In the Integrations area you’ll see a card for the connection (e.g. “AntForms Responses: Sheet1”) with a toggle to enable/disable, and options like Sync existing and View deliveries.
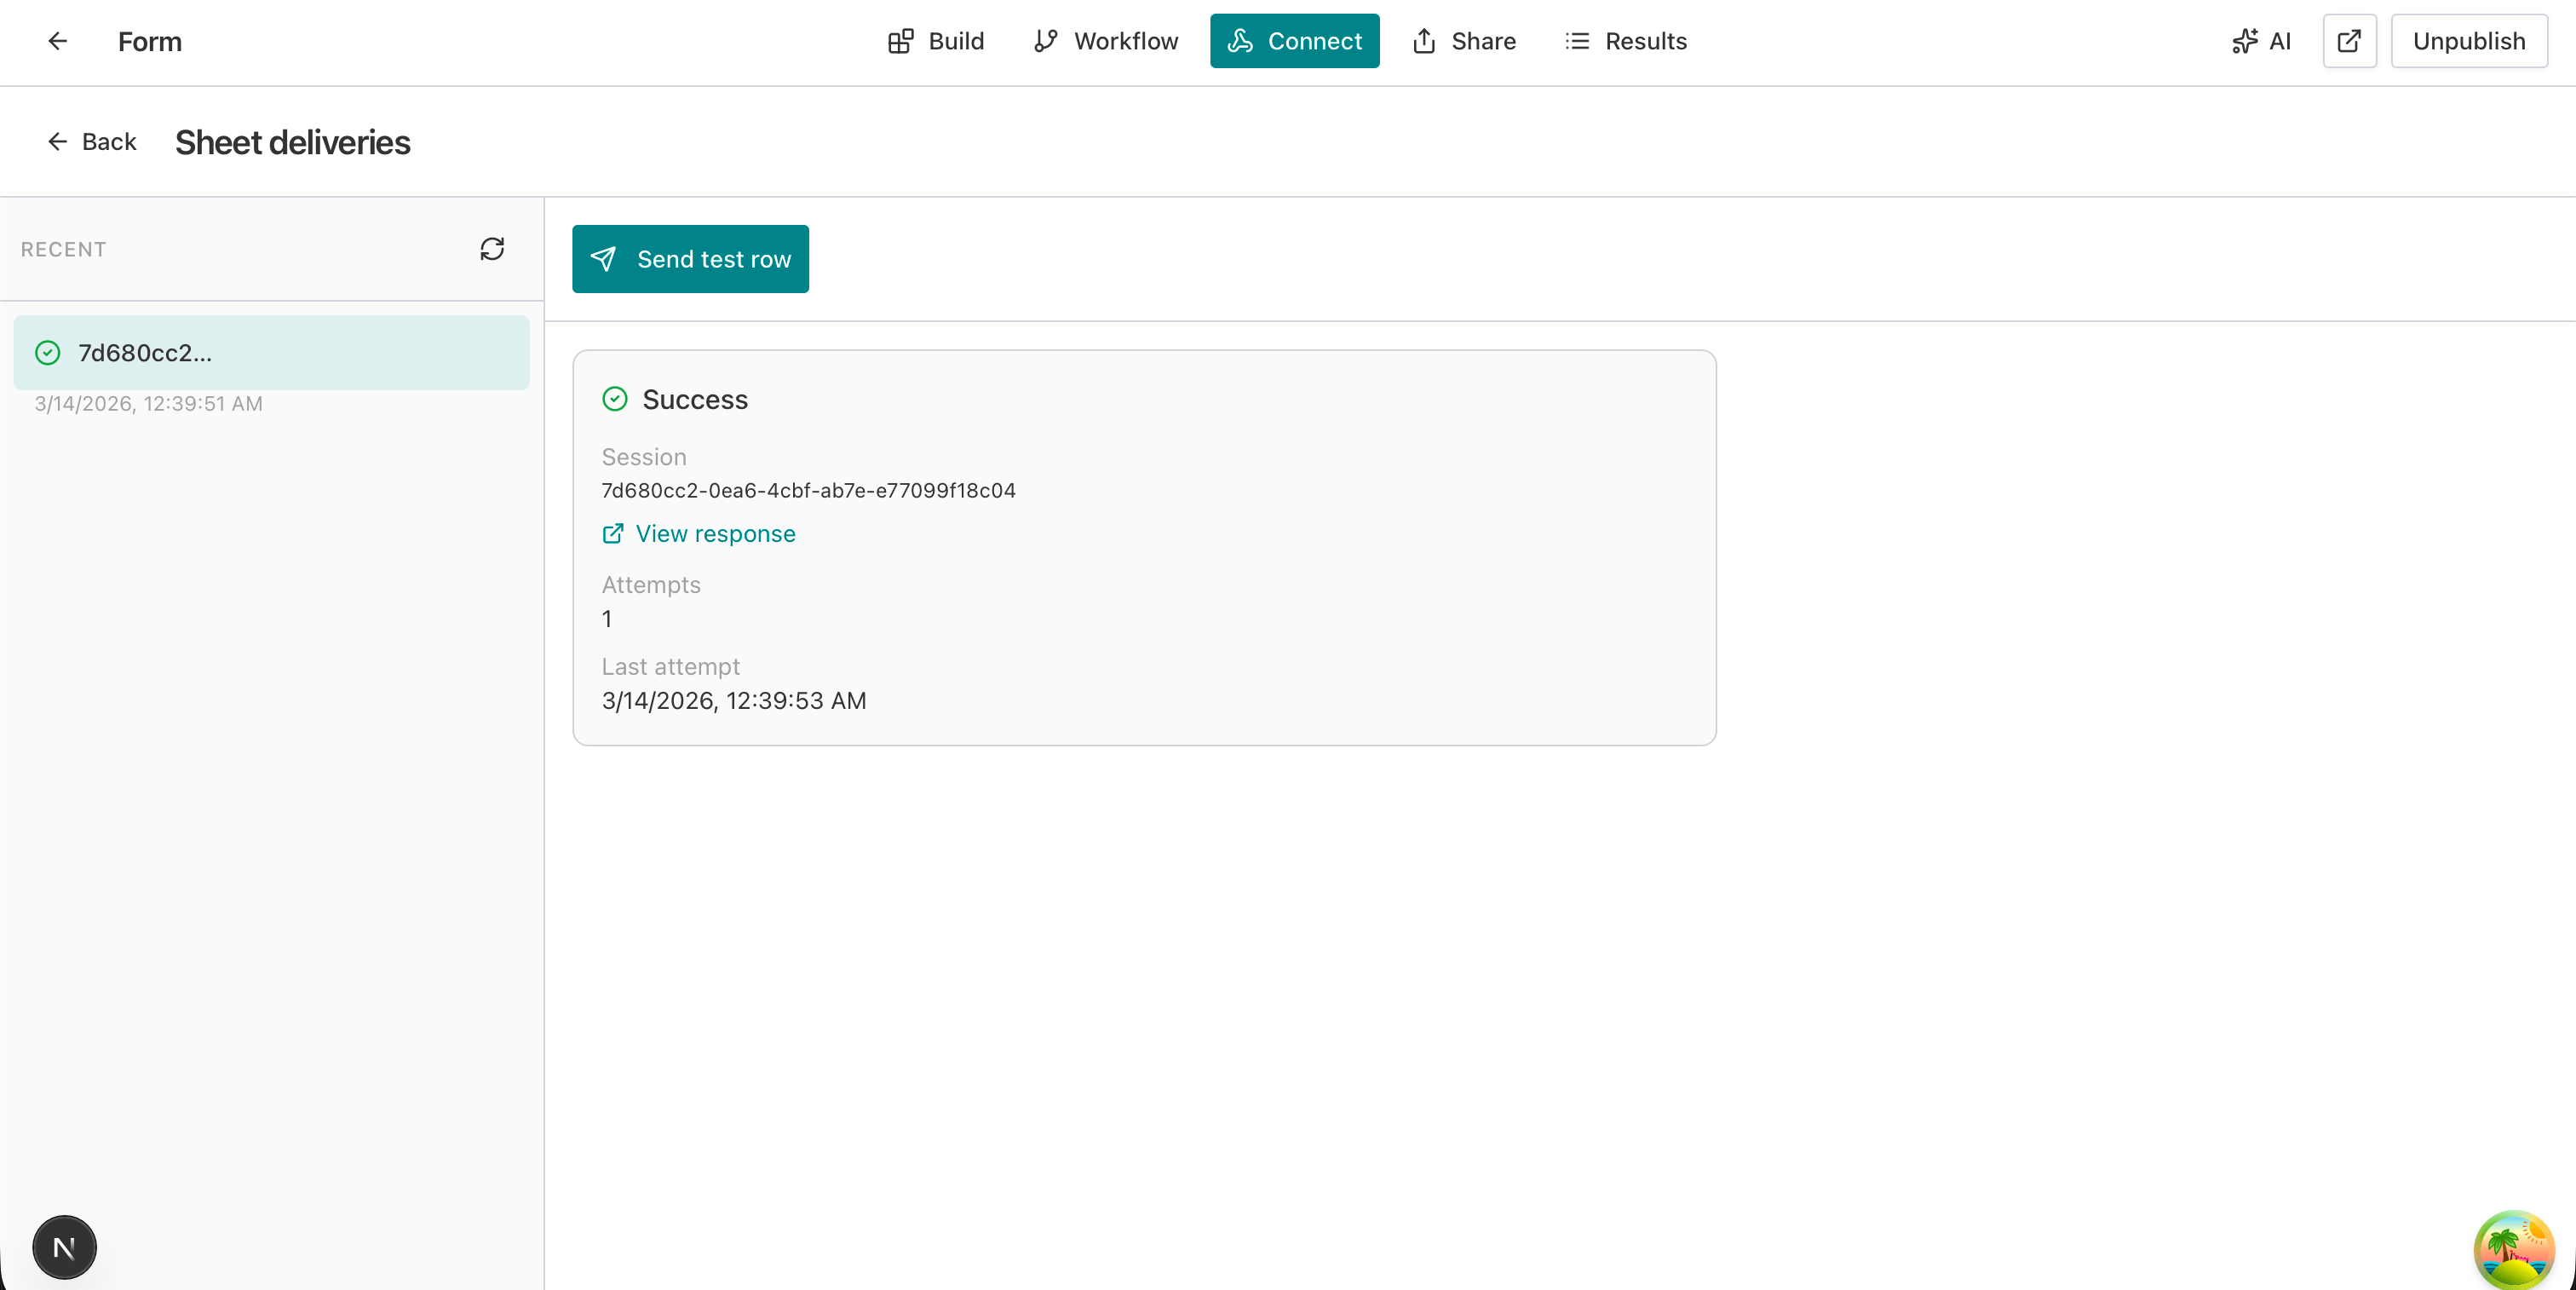
Step 6: Send a test row (recommended). Click View deliveries to open Sheet deliveries. There, click Send test row. A test submission is sent to your sheet. In the deliveries list you’ll see an entry with a green check and status Success; you can open your Google Sheet and confirm the new row and use View response for details.
From here on, every new form submission will add a row to the connected sheet. No further action needed unless you change form questions (see below).
Choosing a Destination: New Sheet vs Existing Sheet
When you set up the Google Sheets integration, the Choose destination step lets you either create a new spreadsheet or use one you already have.
Create new sheet. AntForms will create a new Google Sheet for you. You specify:
- Spreadsheet title (e.g. “AntForms Responses”).
- Sheet name (tab name) (e.g. “Sheet1”).
Use this when you want a dedicated sheet for this form: clean headers, no mixing with other data. The first row will be a header row based on your form fields; each submission adds a row below.
Use existing sheet. You select an existing spreadsheet (or paste its URL) and the tab where rows should be appended. Use this when you already have a master sheet (e.g. “All leads 2026”) and want this form to append to it. Ensure the sheet has (or will have) a header row that matches the form fields; otherwise you may need to adjust columns or use Sync existing after connecting.
If you change form questions later, the sheet’s header row may not match. The UI notes: “If you change form questions later, the sheet’s header row may not match. Use ‘Sync existing’ to backfill, or create a new sheet.” So for big form changes, either run Sync existing or add a new connection to a new sheet.
Testing and Monitoring: Sheet Deliveries
Sheet deliveries in AntForms let you see every sync to Google Sheets and send a test row to verify the connection.
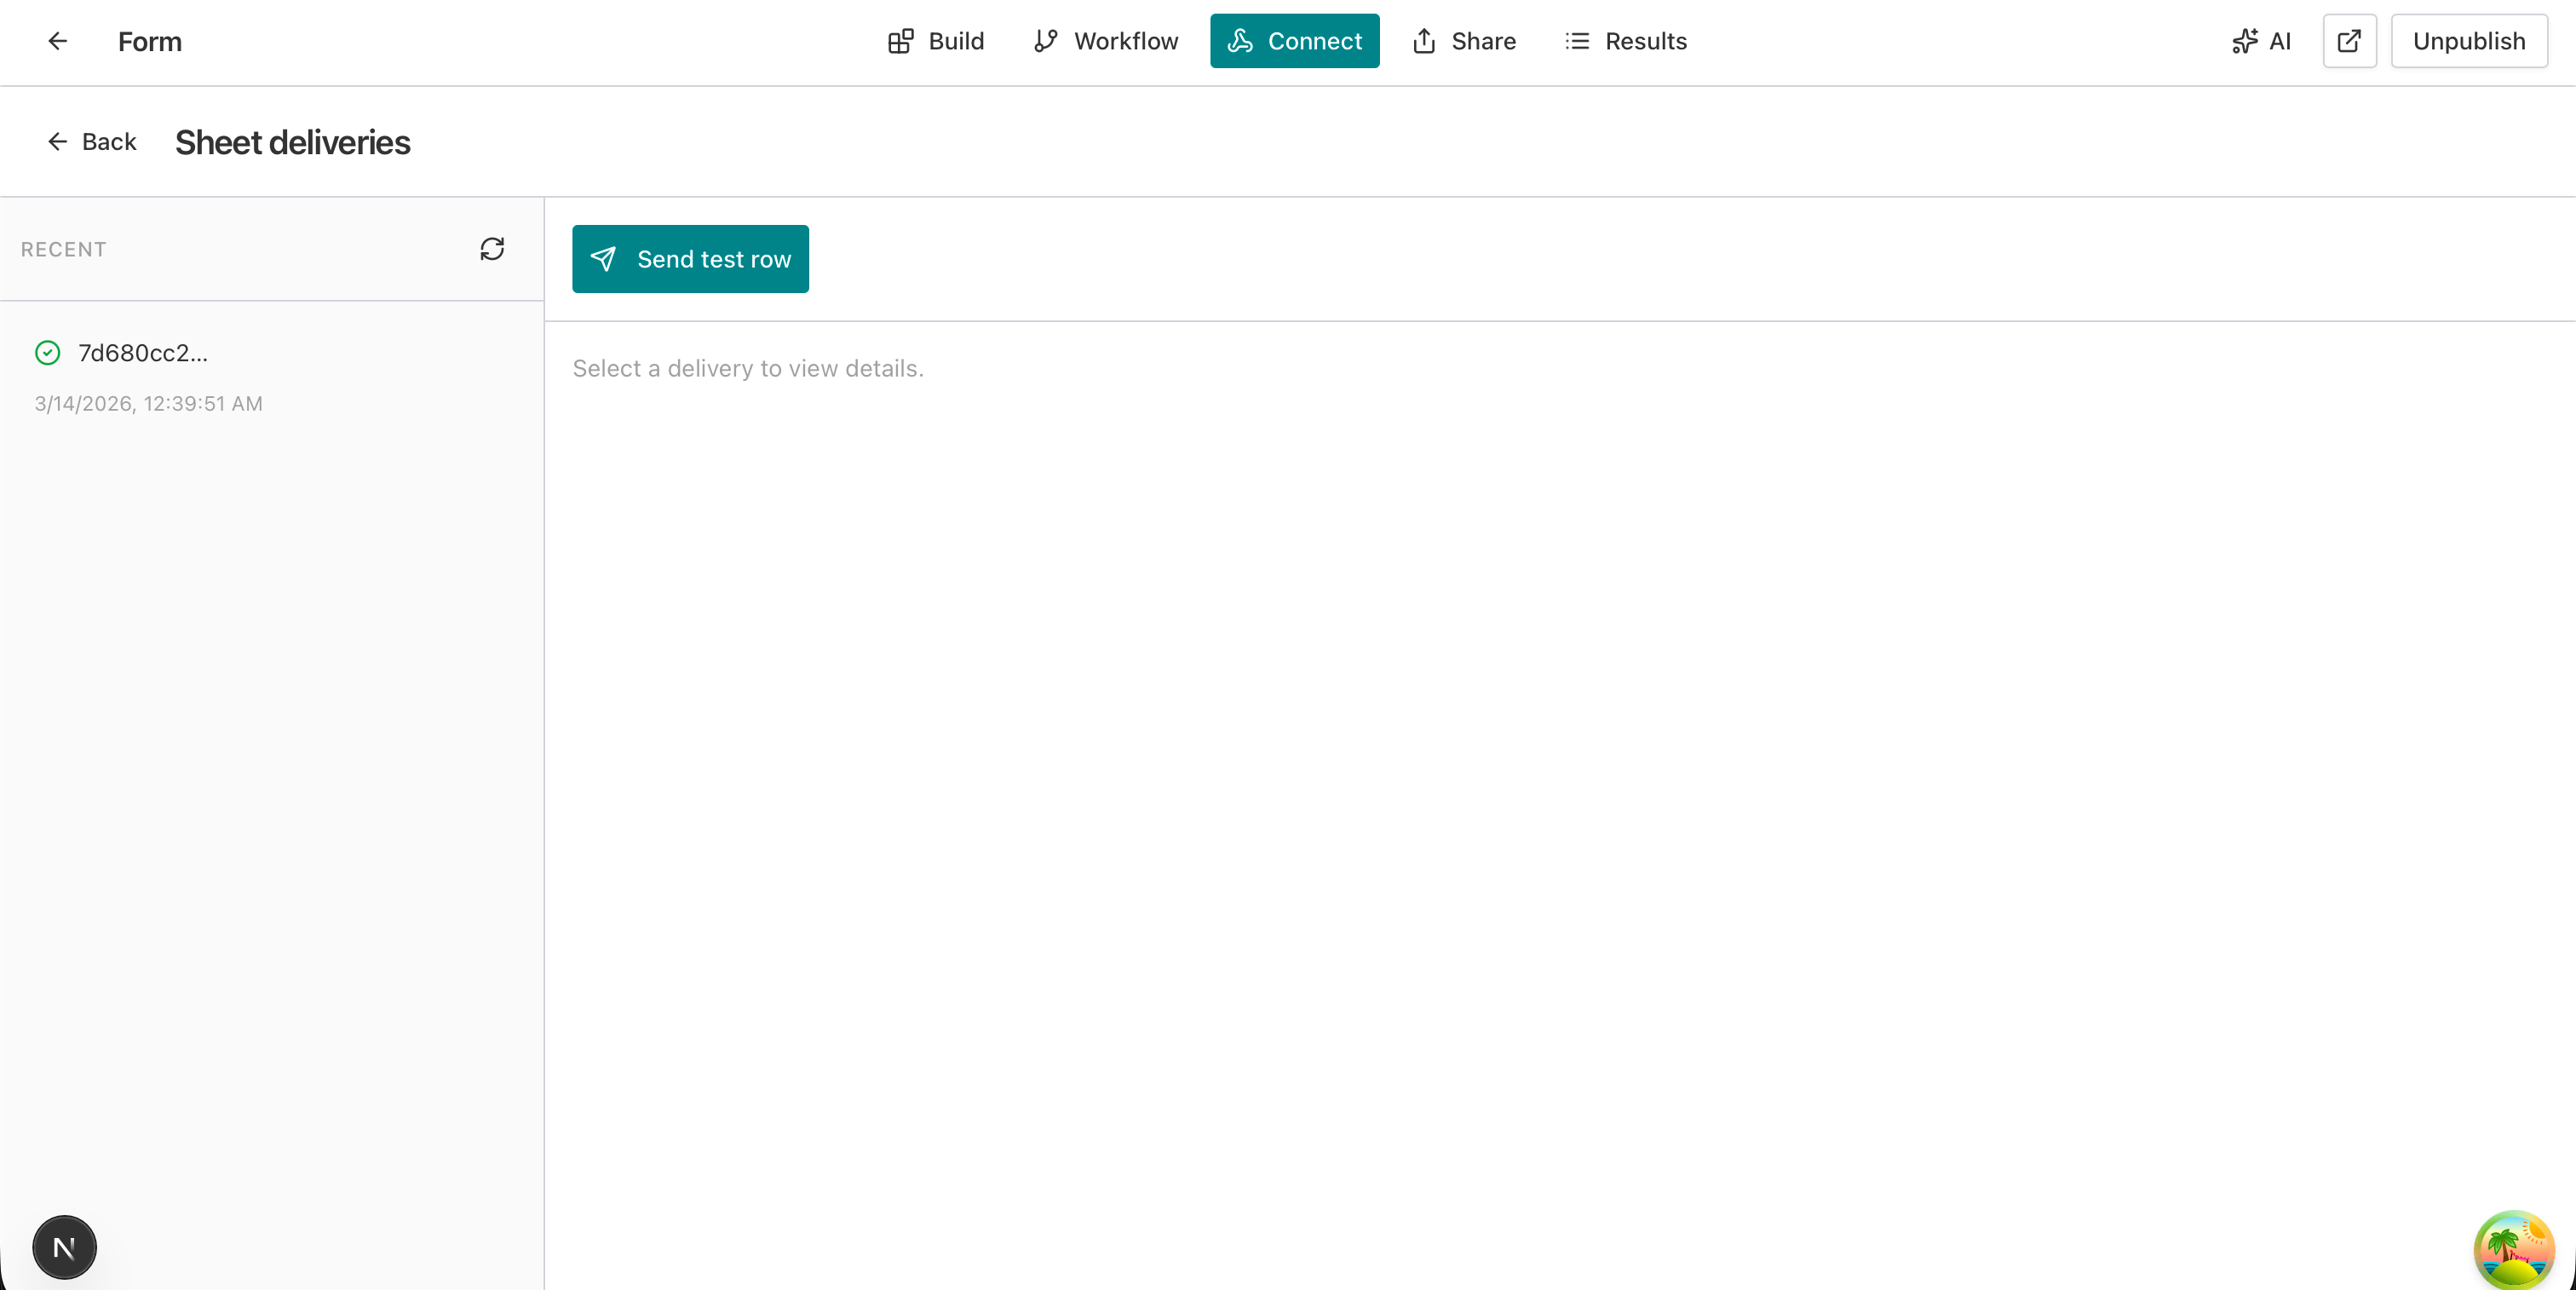
From Connect → Integrations → Google Sheets, click View deliveries on the connection card. You’ll see a Sheet deliveries view with:
- RECENT — A list of recent deliveries (e.g. session ID, timestamp). A green check means the row was sent successfully.
- Send test row — A button to push a sample row to your sheet without submitting the form. Use it right after connecting to confirm the sheet receives data.
- Details — Select a delivery to see session ID, View response link, attempts count, and last attempt time.
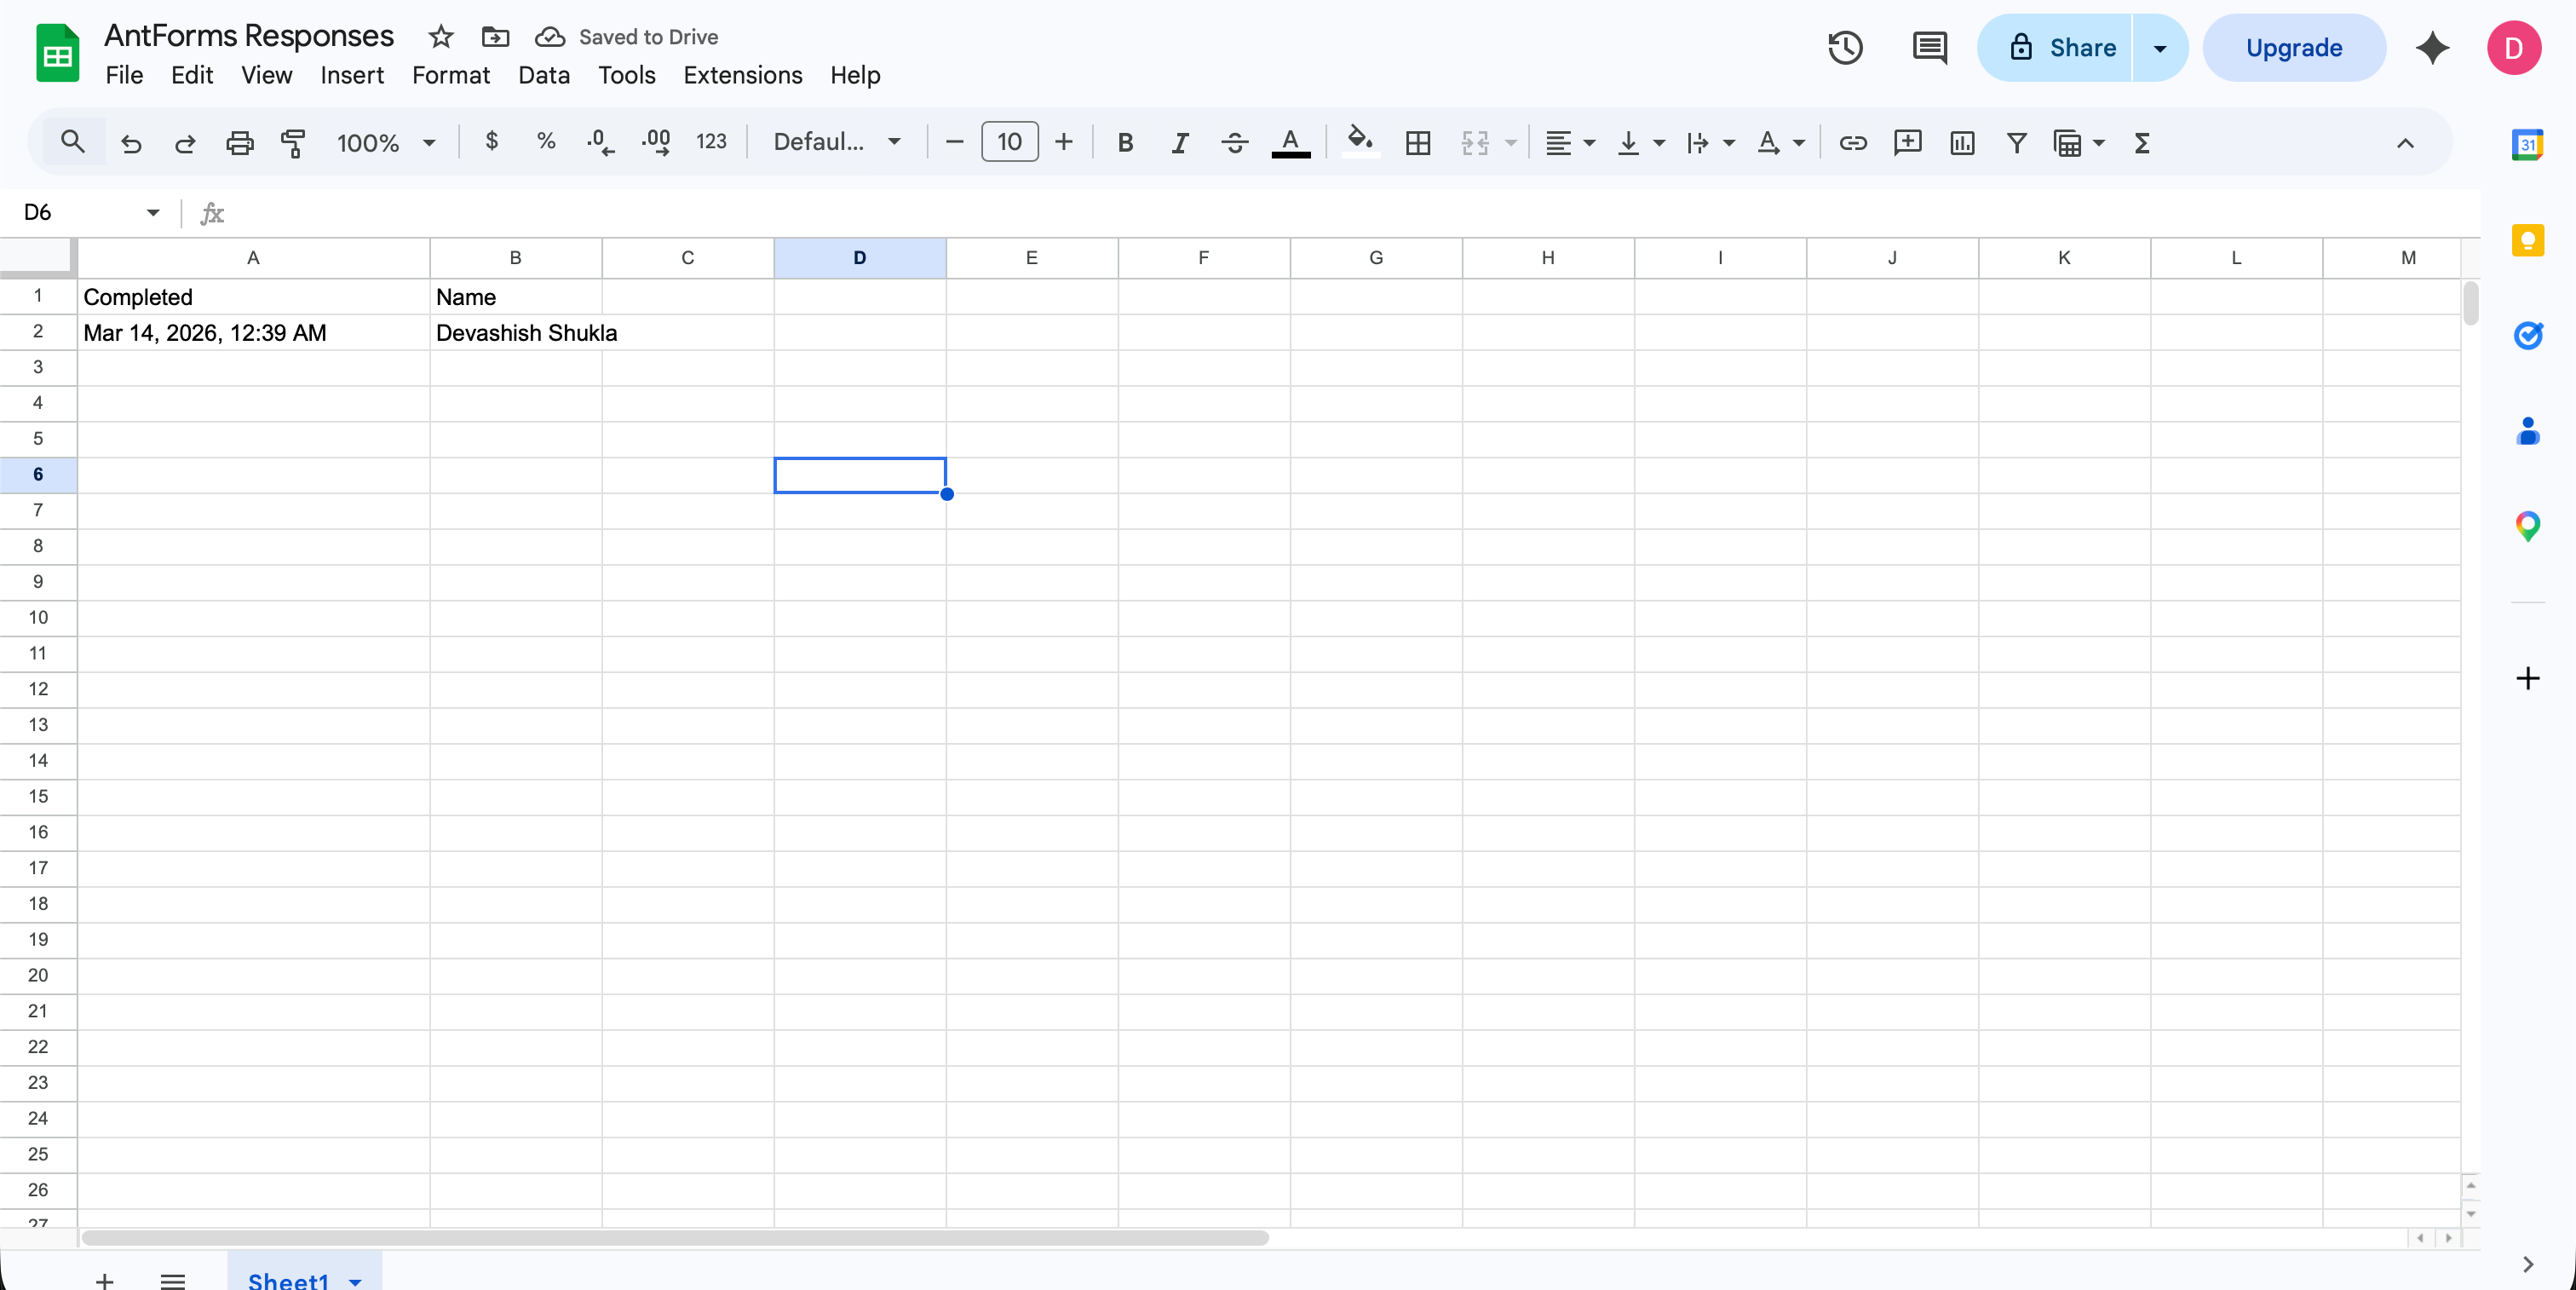
After clicking Send test row, a success card shows Success, session ID, View response, Attempts: 1, and Last attempt timestamp. Opening your Google Sheet (e.g. “AntForms Responses”) you’ll see the new row with columns such as Completed (timestamp) and Name (or whatever fields your form has).
This verifiable pipeline—test row plus delivery history—is how you know the AntForms Google Sheets integration is working and how it helps users avoid “did it sync?” guesswork.
When to Use Sync Existing and Best Practices
Sync existing is for when you already have a connected sheet and either (1) you’ve changed form questions and want to backfill or align the sheet, or (2) you want to bring past responses into the sheet in the same shape as new submissions.
Best practices:
- Match headers to the form. If you add or remove form fields, the sheet’s header row may be out of date. Use Sync existing to update/backfill, or create a new sheet and connect it so headers match the current form.
- One form, one (or more) sheets. You can add multiple Google Sheets connections to the same form if you need the same submissions in different spreadsheets (e.g. “Leads” and “Marketing copy”).
- Test before going live. After connecting, use Send test row and check both Sheet deliveries and the sheet itself. Then publish the form so real submissions flow to the right place.
- Keep the integration on. The connection card has a toggle; leave it on so new submissions keep syncing. Turn it off only if you’re temporarily disconnecting (e.g. switching to another sheet).
For unlimited responses and free analytics in the same tool, see how AntForms supports unlimited responses and free analytics. For workflow and automation ideas, see AI form builder workflow efficiency.
Real-World Use Cases for Form-to-Sheets
The AntForms Google Sheets integration fits any use case where you want form data as rows in a spreadsheet for viewing, sharing, or analysis.
Lead capture and contact. Contact or lead forms send name, email, and message (or more) straight into a “Leads” or “Contacts” sheet. Sales or support can sort, filter, and follow up without leaving Sheets. No CSV export, no manual paste.
Event registration. Registration forms (name, email, ticket type, dietary notes, etc.) append one row per registrant. You get a live attendee list, and you can add formulas or conditional formatting for capacity or waitlists.
Feedback and NPS. Feedback or NPS forms write each response as a row. Columns might be timestamp, score, comment, segment. You can build simple charts or pivot tables in the same sheet. For survey design, see NPS survey best practices 2026 and survey feedback form templates.
Internal requests and intake. Internal forms (IT requests, leave requests, content requests) can feed a shared sheet so the right team sees new rows as they come in. Permissions stay in Google; AntForms just fills the sheet.
Orders and simple commerce. For simple order or quote forms, each submission can be a row (items, contact, notes). Teams can use the sheet for fulfillment or pass data to other tools via Sheets formulas or add-ons. For full order-form design, see how to create an online order form.
In all of these, AntForms’ first integration—Google Sheets—removes the step of “export then paste” and keeps one source of truth in a format your team already uses.
Pros and Cons of the AntForms Google Sheets Integration
Pros:
- No code — Connect, sign in, choose sheet, done. No Apps Script or serverless required.
- Immediate value — Every submission becomes a row as soon as it’s submitted.
- Testable — Send test row and Sheet deliveries give clear confirmation.
- Flexible destination — New sheet or existing sheet; multiple connections per form possible.
- Fits free tier — Works with AntForms’ unlimited-responses approach; you bring your own Google account.
Cons:
- Google-only — For Airtable, Notion, or other backends you use webhooks (or another integration if AntForms adds it).
- Header drift — If you change form questions, the sheet header may not match; you must use Sync existing or a new sheet.
- No in-Sheet transforms — Data lands as-is; complex mapping or branching logic happens in the form or later in Sheets.
Why it works: It solves the most common need—“get my form data into a spreadsheet automatically”—with the least friction, which is exactly why AntForms chose Google Sheets as its first integration.
Frequently Asked Questions
Why does AntForms offer Google Sheets as its first integration?
Sheets is where most small teams already work: free, collaborative, and familiar. Sending form submissions directly to a spreadsheet removes manual export and copy-paste, so AntForms chose it first to deliver workflow value with zero code.
Do I need to write code or use Zapier?
No. Use Connect → Integrations → Google Sheets, sign in with Google, choose or create a sheet, and submissions will sync automatically. No scripts or Zapier required.
What if I change my form questions after connecting?
The sheet’s header row may no longer match. Use Sync existing on the connection card to backfill or align, or create a new sheet and connect it so headers match the current form.
How do I verify submissions are reaching my sheet?
Use Sheet deliveries in Connect and click Send test row. You’ll see success status and can open your Google Sheet to confirm the new row; View response shows the payload details.
Can I use an existing Google Sheet?
Yes. In Choose destination you can create a new spreadsheet or choose an existing one (or paste its URL) so responses append to that sheet.
Is the integration free?
AntForms offers unlimited form responses on its free plan; the Google Sheets integration is part of Connect. You need a Google account to authorize; there are no extra AntForms fees for syncing to Sheets.
Key Takeaway and Next Steps
AntForms’ first integration is Google Sheets because getting form data into a spreadsheet is the highest-impact, lowest-friction win for most teams. It’s required if you want to avoid manual export and paste, and it helps users by giving real-time rows in a familiar, free, collaborative tool—with Send test row and Sheet deliveries so you can confirm every submission lands where it should.
Set it up in minutes: Connect → Integrations → Google Sheets → sign in → choose destination → Save and connect, then Send test row and check your sheet. For custom endpoints or multiple apps, use webhooks and keep Sheets as the first stop for form data.
Ready to connect your forms to a spreadsheet? Try AntForms—build your form, turn on the Google Sheets integration, and let every submission become a row. For more, read webhooks sync form data to Google Sheets or Airtable, how AntForms supports unlimited responses and free analytics, and AI form builder workflow efficiency.